Pretty DIY Concrete Slab Patio Makeover (On A Budget)
We have an outdoor space right off of our walkout basement that was rarely used and needed a serious makeover. It was basically just a plain concrete slab patio that had our HVAC unit and little else.
With warm weather around the corner, I wanted to get it into good shape for adding a seating area and enough space to add a new fire pit.
As you can see from this before picture, this outdoor patio needed a LOT of love!

*When you buy something from our affiliate links, we may make a small commission — but it never affects your price or what we recommend.
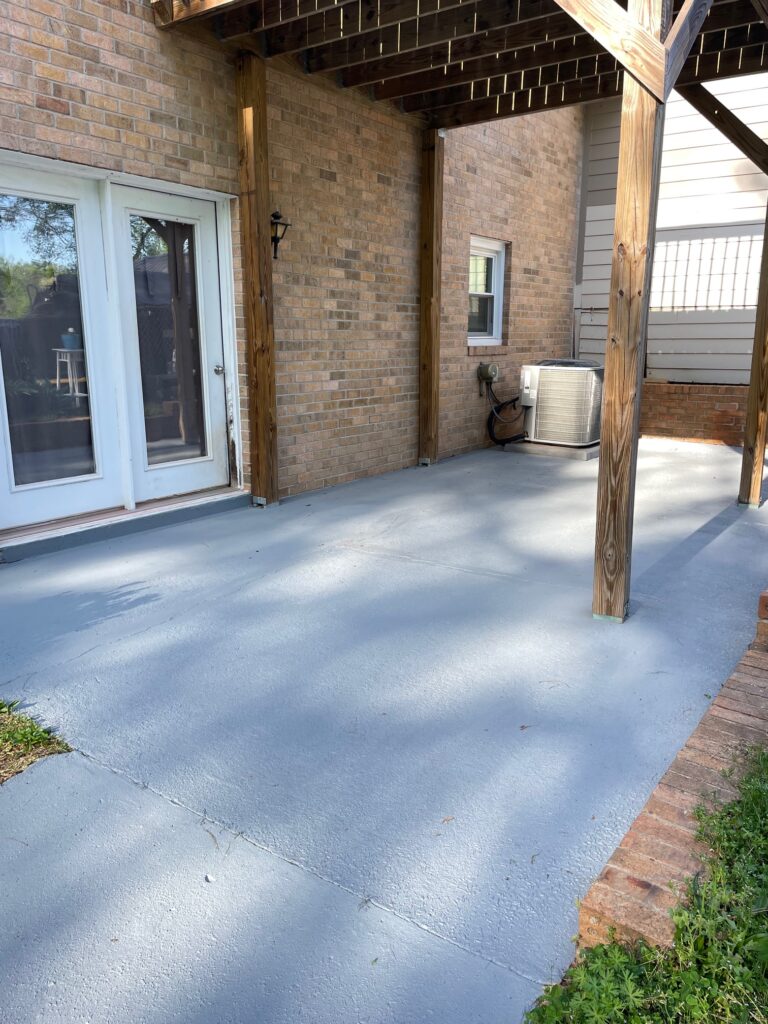
Part of the patio is right under our primary bedroom deck, so its somewhat covered by the wood deck above. However, most of it is completely open to the elements, and it shows.
Our house was built in the 70s, and we think this area is original, meaning the concrete floor could be over 50 years old.
We decided the easiest way to give it a new look would be to pressure wash and then fill in the cracks with a concrete crack filler. Then, we could paint the concrete. Now, we’ve never done this before, so it was a little daunting!
Read our Best Concrete Patio Ideas post to get further inspiration to update the look of your patio!
Concrete Slab Patio Makeover: The Process
Clean The Area

First, we got out the leaf blower to get rid of all the leaves and other yuckiness. I love how leaf blowing takes so little time, but makes such a huge impact.
Then I got out of the pressure washer and gave the patio space a really good cleaning.
I made sure to use a little extra elbow grease to clean out the cracks in the concrete, so I could apply product to the cracks.
Our pressure washer did a great job of cleaning off the concrete and giving it new life, but it still didn’t look great.

Fill In The Cracks and Chips
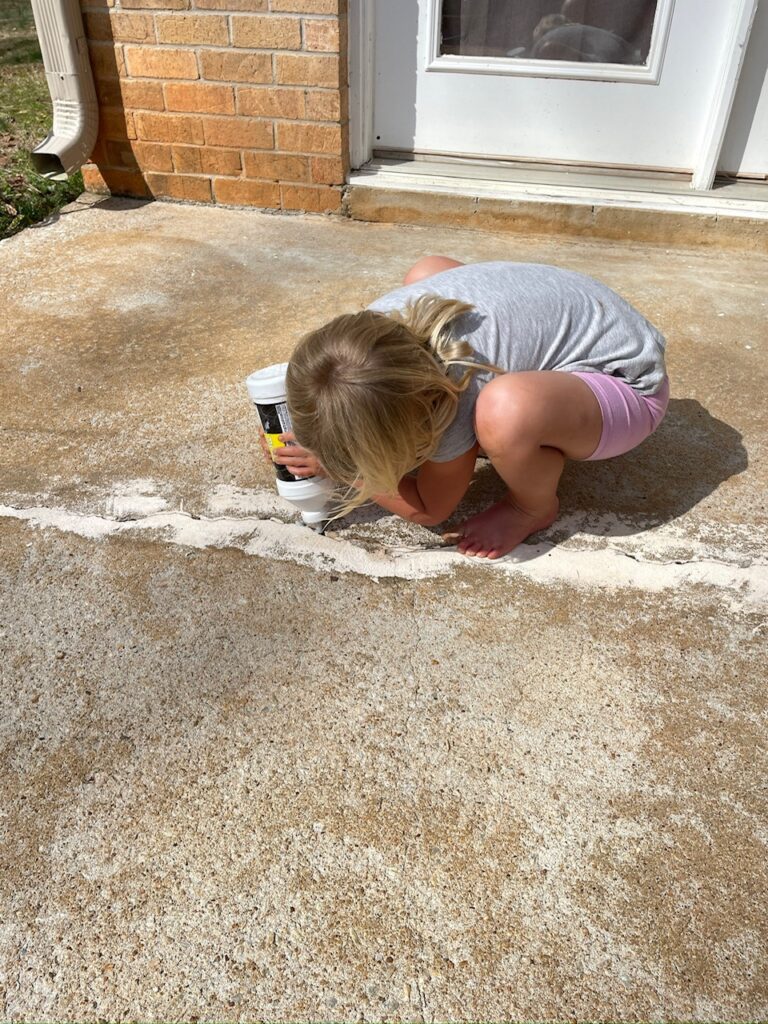
What I love about concrete is that it is typically low maintenance (as opposed to wood decks, for instance!), but if the concrete is old enough, its going to need a little extra attention.
A great way to refresh old concrete is to fill up any of the cracks, and then give it a fresh coat of paint.
I let the patio dry, and then got out the concrete crack fillers.
I used Sakrete Concrete Crack Filler from Lowes.
It’s not meant to work on large areas of concrete, but for small cracks and fissures, it worked great.
I thought the product worked pretty well, although it did shrink somewhat, and despite what the instructions say, I would recommend scraping it flat with the surface of the patio, like you would with caulk.
It did not settle into some of the cracks like I thought it would, so there is some raised areas.
*We have a brick retaining wall that goes around part of the patio. I decided to keep this as is, but to clean it up.
Paint The Concrete

For painting the concrete, there are tons of options out there. I wanted to go with a less expensive alternative from Home Depot so we chose Behr Porch and Patio Floor Paint.
We gave the concrete a fresh coat of paint- you can read all about how to paint a concrete patio here. I highly recommend reading that post before painting concrete for a few helpful tips!
Now we were working with a blank slate– and it was time to start filling it with outdoor furniture, lights, and colorful plants!
Shop The House
One of the most inexpensive ways to decorate plain concrete patios is to find thrifted items as well as to shop your own house.
We have this old patio furniture that was left from the previous owner. I got out some bright colored spray paint and gave them a new fresh look. Spray painting furniture is such a basic DIY Project but makes such a huge impact!
Old Chairs Before (I almost donated these chairs so many times, but kept hanging on to them just in case- so glad I did!):

And after (this color is brighter than my normal aesthetic, but I wanted a colorful area down here since its a place I see the kids hanging out!):

I added light blue outdoor pillows that I’ve had for years, and two plant stands I had in the garage. I like using plant stands as side tables outside, and moving plants if I need somewhere to set a plate or drink.
We had an extra pair of string lights that we hadn’t found a place for yet. We hung them on the wood deck above using nails. I LOVE the way outdoor lighting can class up a backyard patio instantly!
The one thing I bought was this rug from Walmart. I liked the bold blue with the coral chairs, and it was only $40 for a 5×7.

I’m so happy that I was able to go the budget-friendly way and use *almost* all items we already had to outfit the patio. We can get a couple of seasons out of this revitalized space without having to buy anything new – and I’m super happy with that!
Add Plants and Landscaping

I also added some fake plants as well as real plants, and two plant stands I had in our garage. Plant stands work great outside for side tables- just move off the plants if you need somewhere to set a plate of food or a drink!
I decided to use a mixture of real and fake plants in this area, because its somewhat out of the way and I know I’ll occasionally forget to water plants!
These fake ferns from Amazon are fairly inexpensive- I bought them last year and have used them in several different areas, and had extras. I really like the look of them!
The wall you see here is part of our sunroom, and is only half painted as it is getting replaced this spring. We’ll also be replacing the crawl space door.
Because we will be replacing all of the landscaping in this area, I chose to simply add some fake ferns to hide a little of the mess, as a temporary solution.
Our whole sunroom has slowly been getting a makeover and a remodel since we moved in- you can read more about that here.
Add a Privacy Bush
Last fall I planted a boxwood in the front of our house, and it never looked quite right. It also didn’t get much sun, so it wasn’t thriving.
Daniel moved it to the space right off of the concrete slab, and here in the full sun it can spread and get to 30 feet tall in a few years!

It might not offer much privacy right now, but it will eventually and I LOVE that we were even able to repurpose an outdoor bush for this project.
The End Result of our Concrete Slab Patio Makeover
This project was not expensive – it did require a bit of hard work, but overall it only took a few days total, (with waiting for caulk and paint to dry in-between, and going on a spring break trip to DC), a budget just under $200, and some creativity.
The end result of our patio project was a totally refreshed space, perfect for hanging out and enjoying a warm spring afternoon or listening to the cicadas yell at each other on a hot summer evening.
Here’s a reminder of the before:

And after:

Check out our other outdoor posts all about our above ground pool and pool deck.
Makeover concrete patio costs:
Concrete Filler: $12
Spray Paint: $7
Concrete paint (3 gallons): $120
Flowers: $15
Outdoor Rug: $39
Everything else I already owned and repurposed from elsewhere!
Final price of our concrete slab patio makeover: $193


