DIY Tool Wall Organization And Battery Station With Pallet Boards
Take a look at how we created this DIY tool wall organization and battery charging station using free pallet boards!
Our garage-turned-family-room has a large closet that recently got a makeover. As part of making the room more functional and organized, we created an organizer to hang our most commonly used tools and charge our DeWalt power tool batteries.

Before we created this awesome pallet organizer, we had tools, batteries, and chargers lying everywhere—it was such a mess!
We have a large workbench and pegboards in our detached shop, but we have several projects going on at all times in our house and like to keep many of our tools handy.
Creating this area has made a huge difference. Its so much easier and faster to locate the tools we need, and our batteries are always charged when we want to use them!
Here’s a (super embarrassing) before photo of our awesome tool “organization”- is it any wonder I avoided this area at all costs?

Where To Find Pallet Boards

We used pallet boards we already had; our deck supplies came on one from Lowe’s. However, you can check with local businesses or warehouses, retail stores, or construction sites for excess pallets they are willing to give away or sell at a low cost.
Or, check Craigslist or Facebook Marketplace.
Just make sure any pallets you use are in good condition and free from harmful chemicals or treatments.
Want to see the rest of our garage closet makeover? Read this post.
How To Make a Tool Wall Organization Station With Pallet Boards
The Design
Daniel’s idea was to put several pallet boards together and then add a small shelf at the top.
First, we determined the location and dimensions of the pallet organizer. We used the dresser (which holds a lot of smaller tools and materials) below as a guide for how wide to make the organizer, and determined the height based on reachability.
I didn’t want to be unable to reach what we put on the top shelf, and I’m only 5’4″.
Our organizer ended up being 31.5″ wide and 29″ tall.
We decided to route the cords from the battery chargers behind the boards, so we knew we would need thick boards behind the pallet boards to give space between the wall and the organizer.
The Construction
To begin, we unscrewed two of the boards off the pallet and cut them down to size with our miter saw. We ended up with a total of 6 boards.

Next, we painted each of the boards with two coats of the black paint. I always have my favorite furniture paint from Amazon on hand: General Finishes Milk Paint.

Then, we found a leftover 2″ x 4″ from a previous project for the back of the tool wall organizer. Daniel cut it into two boards, located the studs (using a stud finder) and then hung up the 2″x4″s using screws.
He wanted to make sure the tool wall organizer could hold a lot of weight.

Creating The Battery Charging Station
Daniel added the first pallet board to the 2″x4″s, and then installed our DeWalt battery chargers using two screws for each. The battery chargers come with hooks on the back for easy hanging.
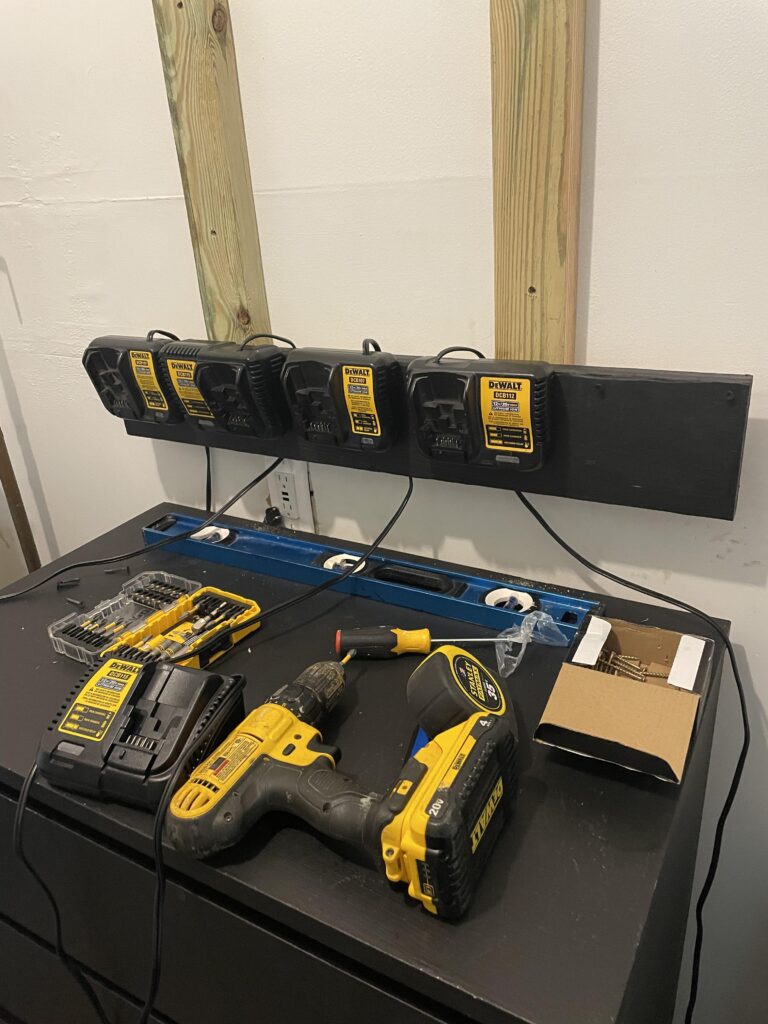
Once he had the screws in place for the chargers, he set the second board on top of the first (but only secured it briefly) and drilled holes in-between the two boards to run the cords through to the back.
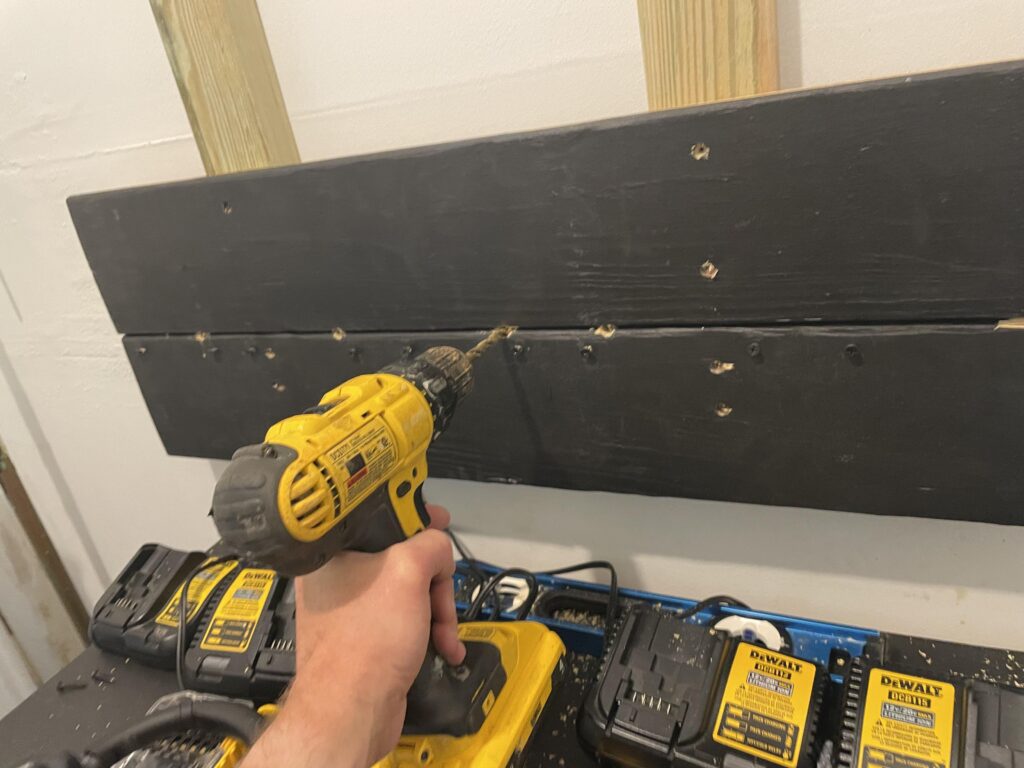
He then removed the top board, installed the battery chargers, ran the cords through to the back and then reinstalled the second board.

Then he added four more pallet boards to the 2″x4″s.

For the top shelf, Daniel used the last pallet board, and leftover trim (to create a lip), which he secured to the shelf with his nail gun.

We painted and then secured the shelf using four 4″x4″ brackets (from Amazon, found here).

Daniel screwed in a power strip on the side of the boards and then ran the charger cords up into the space between the boards and the wall. I love that you can’t see the mess of cords!

Adding The Tools
We determined which tools we use the most and then mapped out where to hang them on the tool wall organization board.
Daniel drilled in some screws to hold our two drills, hammers, headlamps, measuring tapes, etc. We bought a metal screwdriver organizer and Daniel mounted it to the boards.

I looked all over—at Home Depot and Lowe’s—for a screwdriver organizer that could be screwed into a wall, but could only find ones that worked on peg boards. I eventually had to order one on Amazon! This particular set comes with three tool organizers; we may put the other two up on the wall somewhere, eventually.
We gave the old dresser a quick makeover with the same General Finishes milk paint, new silver drawer pulls, and durable contact paper for the top (see more about how I used contact paper for a desk makeover on this post!)

The end result is a MUCH more organized, functional and efficient area that I no longer avoid.
And, we did it for very little cost- the only items we had to buy for this entire project were the screwdriver holders and the silver drawer pulls- everything else was either free or we already had it.
Win win!


