Camper Remodel: Slide Out Floor Replacement
By far the biggest job of our camper remodel, we tackled the floor removal and replacement on a hot, humid day.
It wasn’t fun, but the payoff was huge—the camper now smells and feels dramatically better. It knocked out about 90% of the odor, and even our teenager approves.

This post may contain affiliate links. See our affiliate disclosure here.
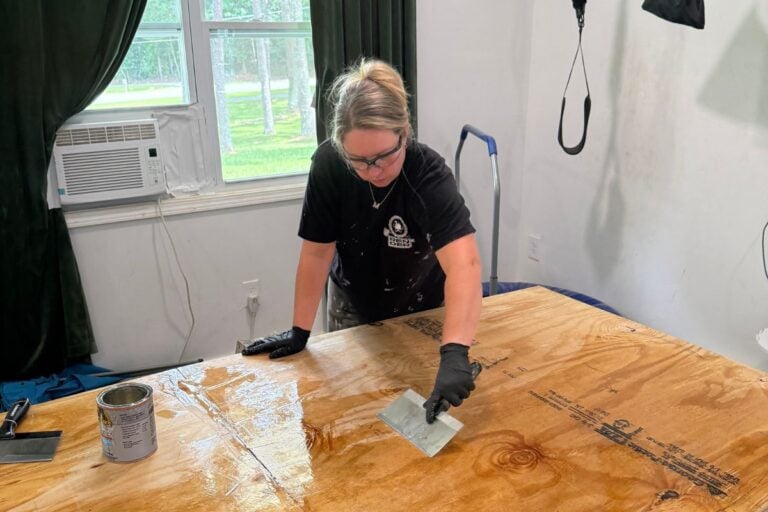
Prior to removing the old slide out subfloor, we fabricated a new floor- you can read all about that here.
Camper Remodel: Slide Out Floor Replacement
We couldn’t find much guidance on fully replacing a subfloor in a slide out this size, so Daniel engineered the process from the ground up.
Credit to him—his creative problem solving carried this project!
And the result speaks for itself: the slide operates smoothly and the new floor is rock solid.
Tools Needed
Circular Saw
Sawzall
Hammer
Floor Jack (2 would have been ideal!)
Materials Needed
Replacement bolts, nuts, and washers to match the originals
Wood screws for trim and hardware reinstallation
2×4 lumber for temporary supports and spreader bars
Wood or composite shims for fine adjustments
Jack pads or cribbing blocks for safe jack footing
A LOT OF PATIENCE
Camper Remodel: Removing Floor In Slide Out
We started by clearing the space. The couch came out first and went to a thrift store.
The dinette table and benches came out next and went to the shop since we plan to reuse them with new cushion covers.
With the furniture gone, we pulled up the carpet on top of the slide out. That’s when we realized we needed to completely remove the entire subfloor, and fabricate a new one.

Once the new floor was ready, we got to work removing the old one.
Here’s a couple close ups of both the rotten slide out floor, and the carpet trapped underneath. Its no wonder it smelled so bad!


Removing Hardware
First came the hardware. There was a lot of it. The slide rides on a metal beam, and that beam was tied in with bolts and screws underneath.
Daniel crawled under the slide and worked them out one by one. Trim ran along both sides of the slide with screws hidden in inconvenient spots, so that all had to come off too.

The screws and bolts were so rusted and corroded that they were unusable.

Our first plan was to remove the entire floor, section by section. But once we thought about it more, we realized something important.
If we removed the entire floor in one go, the gap between the slide walls and the main camper floor would close up.
That gap is exactly where the new floor has to slide back in. Daniel was also worried the slide out walls could slide down past the metal supports, damaging the whole slide out.
If it closed, getting a new board in would be nearly impossible.
To solve that, we shifted the slide walls inward without letting the metal beam move. The goal was to let the walls rest over the beam so they wouldn’t drop too far while the old floor came out.
A quick note if you’re doing this yourself: take photos of the underside before you remove anything, and take note of every fastener location as you go.
In the end, the back wall didn’t touch the metal beam because we used supports – but the peace of mind was still helpful.

The rack and pinion system sits at the bottom of the slide, and we didn’t have to touch it, which was a relief. Still, we were cautious.
This isn’t something we’ve done before, so we moved slowly and checked our steps as we went.
Put the screws back in the same places and keep the hardware in the same orientation. A slide that’s even a little off can bind or refuse to travel correctly.
Daniel cut out the rotten section first. That portion practically fell away from the wall because the wood had deteriorated so badly.

The rest of the floor fought back.
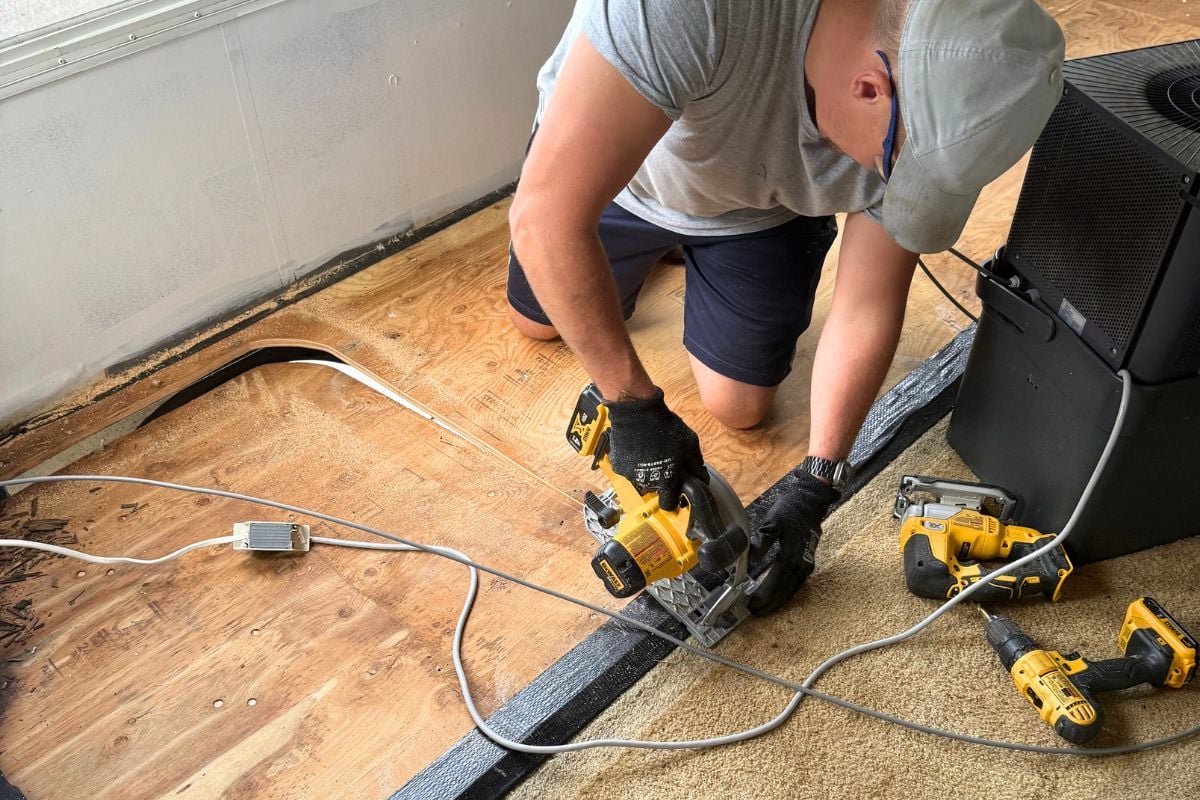
Screws were tucked into spots a driver couldn’t reach, so he used a Sawzall to cut through the fasteners. It nicked up the trim a bit, but it was the only way to free the panel.

We had wiring that passed up through the floor in one area. Daniel cut around that section without touching any of the wiring.

This is the section that got notched on the new board to fit around the wires going up into the wall.

Before removing the larger, intact portion of the subfloor, he set jacks under both slide walls.
Without support, the walls could sag and pinch the opening where the new boards needed to go.
With the supports in place and the last screws out, we were able to wiggle the remaining subfloor panel out from under the walls and trim, and drop it to the ground below.

Once the wood was out, we finally had access to the carpet that had been trapped under the lip of the old floor. We pulled the screws, tore the carpet out, and the smell improved immediately!

We tossed the old board and the carpet. They were beyond saving and honestly just gross.
With the space cleared and supported, we were ready to install the new subfloor.
Camper Remodel: Replacing the Slide Out Floor
This step took the longest. The idea is simple, but the execution was a lot of careful jockeying with jacks and 2x4s while inching the new board into place.
With the old subfloor out, we carried the new board into the camper and slid it under the left-side trim of the slide out.

Once that edge was tucked, we eased the opposite side under the right-side trim. From there it became a slow back-and-forth.
Daniel kept adjusting his supports and the jack to create just enough clearance for the board to move under the trim and the wall without binding.

It sounds straightforward, but in real life it took a few hours of small moves and constant checks.
At times, Daniel needed to use a scrap piece of wood and a hammer to gently tap the new floor in further.

He also added wedges under the slide out trim inside the camper.

When the board reached the back of the slide, and cleared the metal beam, Daniel measured from both ends to confirm the walls were square.
The slide needs equal spacing on each side or it won’t travel correctly.
There’s also a small gap between the beam—where the bolts pass through—and the back wall, so that dimension had to match the original.

He used the old subfloor as a reference for bolt and screw locations, transferred the measurements, and reattached the wiring at the notched metal plate.
We installed only a few bolts and screws at first so we could test the slide. It ran perfectly.
WHEW!
With that confirmed, Daniel finished installing the remaining fasteners.

It was meticulous work, but the fit and movement were spot on!
Eventually we’ll add the new flooring- vinyl planks or something similar. But for now we are holding off until all our painting projects are finished.
Camper Remodel: What’s Next
After that huge job, we’re both hoping the next project we tackle is a little less stressful. However…we’re replacing the roof so– will it be??
Stay tuned and remember to subscribe to the blog if you haven’t already!

Whew! I cannot even imagine….but I’m so proud of you both!!
Thank you! Such a relief to be done with it.
That sounds incredibly complicated. You really thought it through!! Can’t wait to see it finished.
So complicated! Can’t wait for it to be done.
Wow what a project! But you got it done with careful planning. I think even an RV repair shop would’ve called that major reconstruction. The step-by-step summary was awesome!
Thanks Rick!
This is a TON of work. Better you than me!
It was either that, or burn it to the ground lol!