Detached Garage Makeover: DIY Updates on a Budget
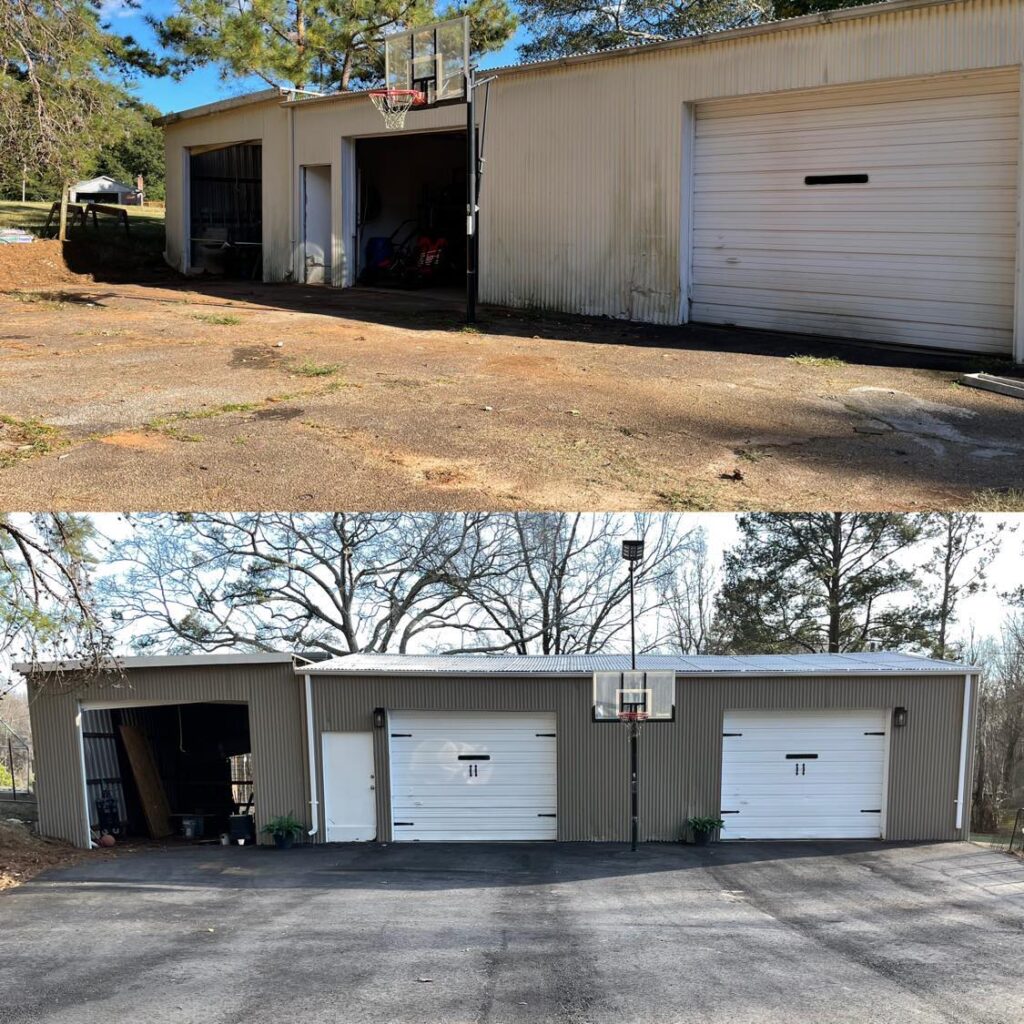
Our Detached garage makeover, before and after.
*When you buy something from our affiliate links, we may make a small commission — but it never affects your price or what we recommend.
We have been updating our home for the past year and a half, and there is still so much to do. With converting our attached garage to a family room, working on our backyard makeover, and a myriad of other high-priority projects, updating our old detached garage was super low on our priority list.
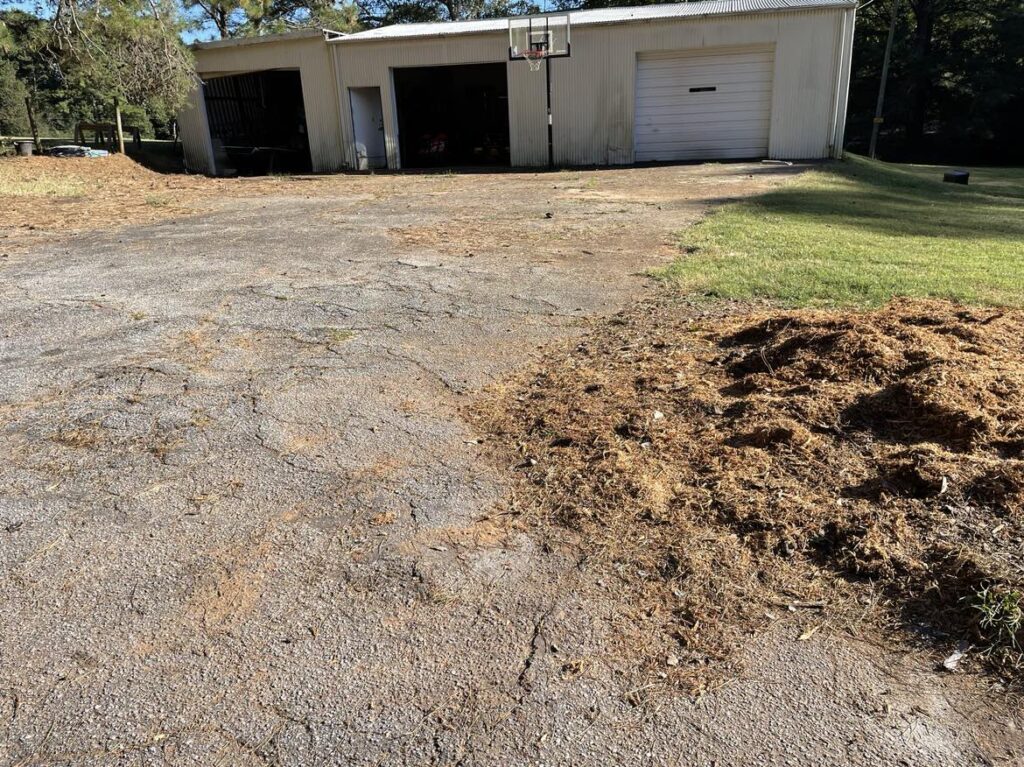
And yet, it was such an eyesore. It sits directly next to our house and is really run down, dirty and trashed. It was in terrible need of new aluminum panels, a new roof, a major clean up, and a big interior renovation.
Shortly after moving into our house in 2022, we completed a brand new driveway project. This had a positive impact on the look of our house and detached garage, breathing new life into the area and creating a great space for our kids to play.
But, the garage looked the same. So while it was a huge improvement, the trashy look of the garage still bugged me. It sits right next to our home, so it really affected the overall curb appeal!
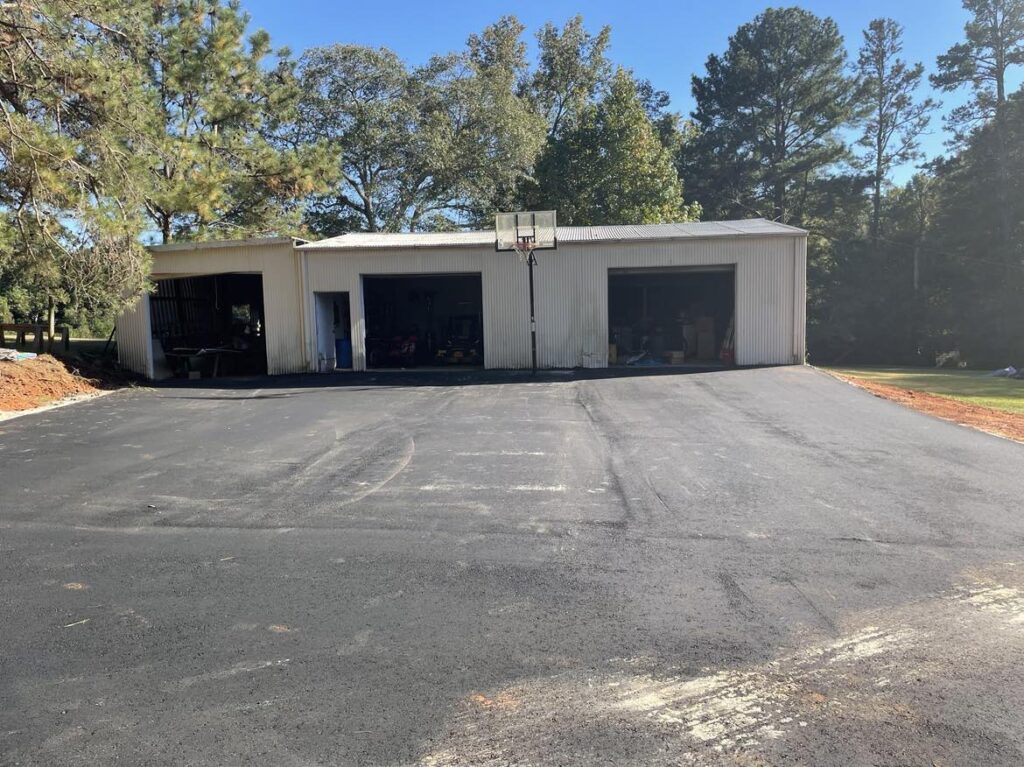
After over a year of just simply trying to ignore it, we finally decided that it was time to at least do something- even just a few small projects to bring it to a level that wasn’t quite so dilapidated.
So, we decided to do the one thing that is always a good idea: paint and accessorize it!
Painting A Turd. Putting Lipstick on a Pig.
I like to call this project: Painting a Turd. Or Putting Lipstick on a Pig. Because really, its just only somewhat hiding all the work that still needs to happen.
But you know what? I’m perfectly fine with that waiting for another day. Or another year!
Let’s dive in to what we did to turn our old, yucky detached garage into a better version of itself.
Our detached garage makeover
In this post, we will share the story of our garage makeover, where we embraced DIY projects and made affordable upgrades to breathe new life into our space.
Our goal in sharing this project is to inspire others to take on their own home improvement projects, even if perfection is not the end result!
1. A Fresh Start with Pressure Washing
Our first step in the garage makeover process was to thoroughly clean the exterior. We used a pressure washer to remove dirt, grime, and years of neglect. This simple yet effective task made a remarkable difference, revealing the true potential of the space.
2. Choosing the Right Paint Color
I briefly considered painting the garage barn red, and giving it a cute farm vibe. After obtaining some common sense, I realized that was a terrible idea because this structure will never look like a barn, and would be too busy next to the house and sauna cabin.
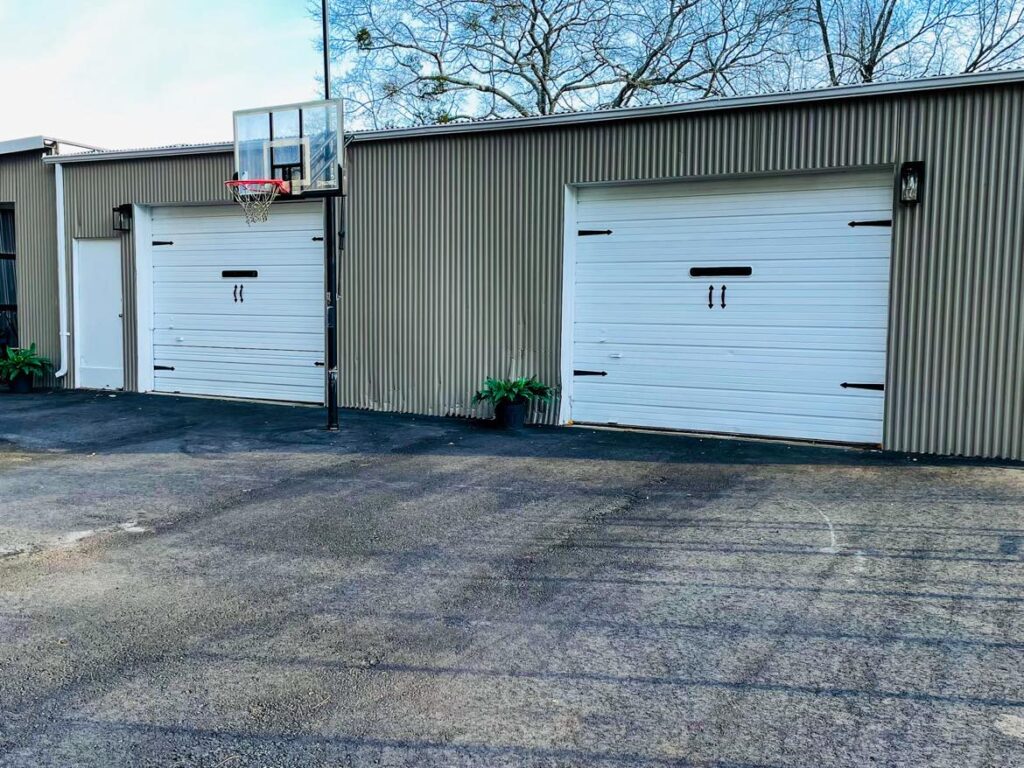
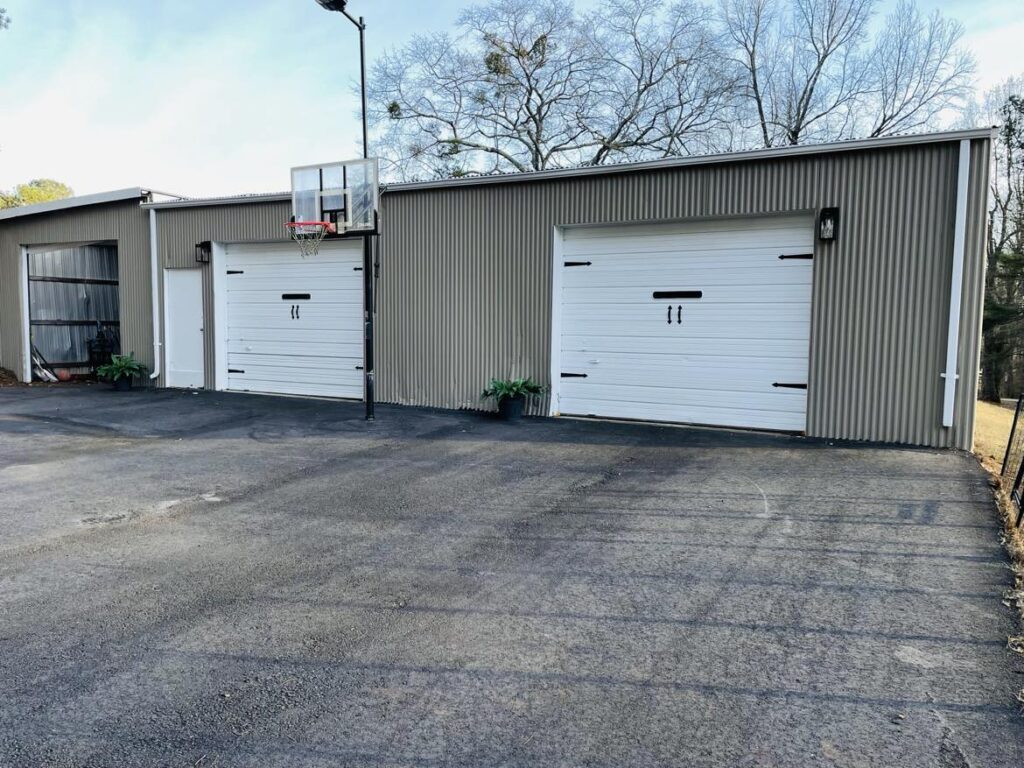
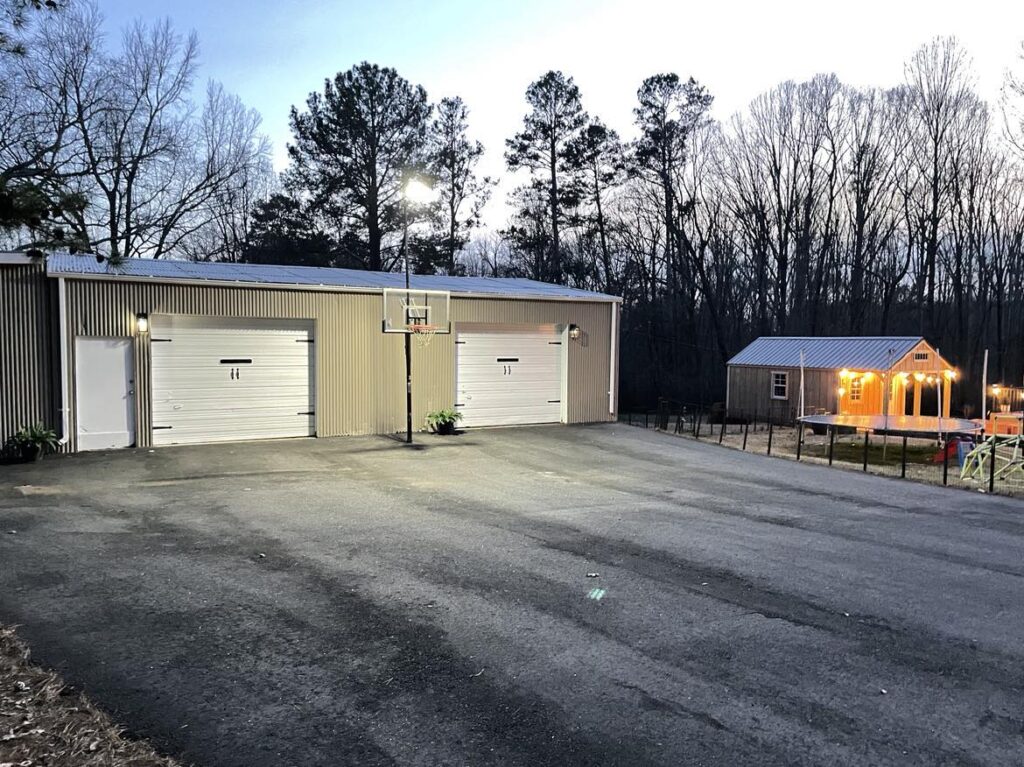
To create a cohesive look with our house, we opted for the paint color Keystone Grey from Sherwin Williams, which matched the exterior of our home. Choosing a harmonious color scheme between the house and the garage helped create a unified and aesthetically pleasing appearance.

3. Painting the Trim and Garage Doors
To brighten up the exterior, we painted the trim white. This not only freshened up the look but also made the details stand out against the grey backdrop. Additionally, we painted the garage doors white to give them a clean and crisp appearance.

4. Adding Faux Hinges and Handles
To elevate the garage doors’ aesthetic, we decided to add faux hinges and handles. Instead of investing in expensive hardware, we found affordable magnetic hinges and handles on Amazon. I LOVE how these simple magnets give the garage door a classier look without the expensive price tag!

5. Black Light Fixtures for a Modern Touch
To further enhance the overall look of the garage, we bought new sleek, black light fixtures, also from Amazon. The black fixtures added a modern touch and complemented the grey and white color scheme.
Upgrading light fixtures is a budget-friendly way to instantly elevate the appearance of any space!
6. Embracing Imperfection:
While the garage makeover is a work in progress, we are so much happier with where it is today, and hope sharing this inspires others to embark on their own DIY projects.
Home improvement doesn’t always have to be perfect or expensive. We hope to encourage others to take small steps towards improving their homes, even if it means starting with modest budgets and making gradual upgrades over time.
Lessons from our Garage Makeover
Our garage makeover journey has taught us that with creativity, resourcefulness, and a willingness to embrace imperfections, you can transform any space on a budget.
By pressure washing, choosing the right paint colors, adding faux hardware, and incorporating modern light fixtures, we were able to give our old detached garage a new lease on life.
Remember, the joy and satisfaction come not only from the end result but also from the process of making your house a home through DIY projects.
